
Git Bash Aliases

Introduction
Do you have a have a distaste for typing the same things over and over again? I’m sure you do! Do you have a distaste for typing the same things over and over again? Who doesn’t?!
This article is the result of me typing git commands.. and well.. being lazy about it!
I’ll show you how to configure git aliases so that you can quickly preform your git commands without the ho-hum of whole words!
Prerequisites
- Windows 10
- https://git-scm.com/download/win
Aliases
Lets look at a common scenario of wanting to add all adds/edits and commit the changes to your git branch.
git add -A && git commit -m "my comment"
Git allows for aliases but you have to type a little more.
git ac "my comment"
With bash, you can type something like
gac "my comment"
If you think this doesn’t matter, this article is not for you! For the rest of us lazy-fingered devs, proceed to the steps below!
Steps
Okay, assuming you’ve installed git for windows and have git bash installed. Lets knock out some quick steps that will get you on your way to typing less and coding more!
- Open git bash
- You can do this from you start menu by just searching for ‘git bash’
- Run these commands
cd ~/ notepad .bash_profile - Paste the following into the notepad file and save it
# ---------------------- # Git Aliases # ---------------------- alias g='git' if [ -f /etc/bash_completion ] && ! shopt -oq posix; then . /etc/bash_completion fi function_exists() { declare -f -F $1 > /dev/null return $? } for al in `__git_aliases`; do alias g$al="git $al" complete_func=_git_$(__git_aliased_command $al) function_exists $complete_fnc && __git_complete g$al $complete_func done - Find your git config file. This command should tell you right where it is. It should be located at C:\Users\your_user_name\.gitconfig
git config --global --edit - Using explorer or your terminal, open the .gitconfig file.
- Paste the following into your .gitconfig file
[alias] # logs l = log --pretty=format:"%C(yellow)%h\\ %ad%Cred%d\\ %Creset%s%Cblue\\ [%cn]" --decorate --date=short lg='git log --graph --oneline --decorate --all' a = add ap = add -p aa = add . ac = !git add -A && git commit -m c = commit --verbose ca = commit -a --verbose cm = commit -m cam = commit -a -m m = commit --amend --verbose d = diff ds = diff --stat dc = diff --cached a = add ap = add -p aa = add . c = commit --verbose ca = commit -a --verbose cm = commit -m cam = commit -a -m m = commit --amend --verbose d = diff ds = diff --stat dc = diff --cached s = status -s co = checkout cob = checkout -b # list branches sorted by last modified b = "!git for-each-ref --sort='-authordate' --format='%(authordate)%09%(objectname:short)%09%(refname)' refs/heads | sed -e 's-refs/heads/--'" # list aliases la = "!git config -l | grep alias | cut -c 7-" - Run the following in bash or simply close and re-open your bash terminal
source ~/.bash_profile - Run the following to see your git aliases
 //in cmd or powershell
 git la
 //in bash you can also do
 g la
 //also works in bash
 gla
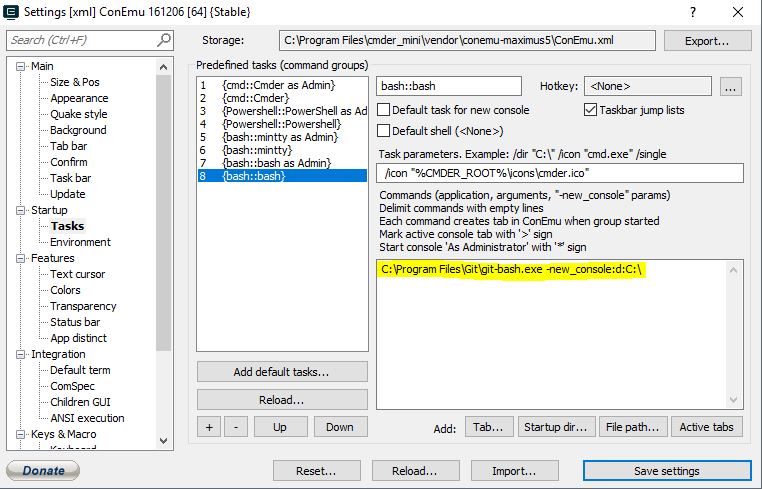
Cmder
To use bash with cmder you can specify bash to be your startup terminal.
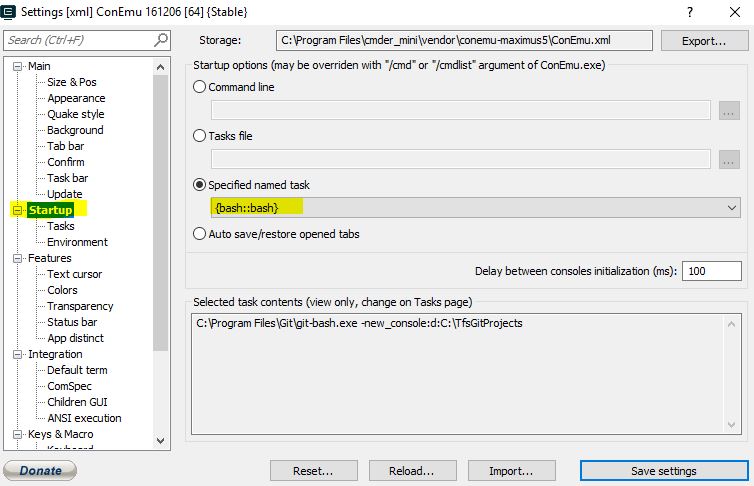
In my bash settings I had to put the following below instead of the default to get bash to load. It seems like they have an outdated git-for-windows directory reference. I also had issues with the variables used so I just kept it simple with the following command to open bash. You can specify the start directory to whatever you’d like.
C:\Program Files\Git\git-bash.exe -new_console:d:C:\
VS Code Terminal
To be able to benefit from our git bash aliases in VS Code we must overwrite a couple user settings.
Open settings by using (Ctrl + ,) or
- File Menu
- Preferences
- Settings (Ctrl ,)
Then paste the following lines into the right settings override window.
{

...

//Git Bash
"terminal.integrated.shell.windows": "C:\\Program Files\\Git\\bin\\bash.exe",
// start a login shell to pick up aliases from .bash_profile
"terminal.integrated.shellArgs.windows": ["--login"]
}
Summary
So there you go. You’ve got git aliases set up as well as bash aliases to help you even more. One downside to the bash function shown above is load time for your bash terminal. If you find it to be too slow you can use something like the following instead of a function that scans your git aliases.
# ~/.bash_profile
# ----------------------
# Git Aliases
# ----------------------
alias g='git'
alias ga='git add'
alias gaa='git add .'
alias gaaa='git add --all'
alias gau='git add --update'
alias gb='git branch'
alias gbd='git branch --delete '
alias gc='git commit'
alias gcm='git commit --message'
alias gcf='git commit --fixup'
alias gco='git checkout'
alias gcob='git checkout -b'
alias gcom='git checkout master'
alias gcos='git checkout staging'
alias gcod='git checkout develop'
alias gd='git diff'
alias gda='git diff HEAD'
alias gi='git init'
alias glg='git log --graph --oneline --decorate --all'
alias gld='git log --pretty=format:"%h %ad %s" --date=short --all'
alias gm='git merge --no-ff'
alias gma='git merge --abort'
alias gmc='git merge --continue'
alias gp='git pull'
alias gpr='git pull --rebase'
alias gr='git rebase'
alias gs='git status'
alias gss='git status --short'
alias gst='git stash'
alias gsta='git stash apply'
alias gstd='git stash drop'
alias gstl='git stash list'
alias gstp='git stash pop'
alias gsts='git stash save'
References
- https://gist.github.com/mwhite/6887990
- https://jonsuh.com/blog/git-command-line-shortcuts/
- https://git-scm.com/book/en/v2/Git-Basics-Git-Aliases
- http://durdn.com/blog/2012/11/22/must-have-git-aliases-advanced-examples/
- https://github.com/GitAlias/gitalias
- https://stackoverflow.com/questions/2114111/where-does-git-config-global-get-written-to


Comments